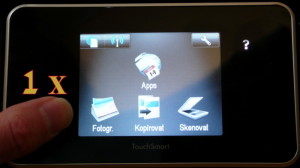
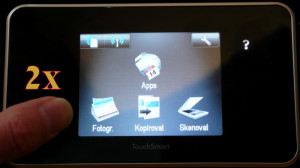
 V případě, že se Vaše tiskárna ( HP Photosmart All-in-one B210a ) do jakýchkoliv problému, které již nedokáže vyřešit „Tovární nastavení“ přístupné ze základní obrazovky, nezbývá jiná možnost než použití níže popsaného postupu. V mém případě tento postup pomohl vyřešit problémy s připojením k síti.
Zde je postup provedení „Hard Resetu“, po jehož provedení bude tiskárna ve stavu, ve kterém se nacházela v okamžiku prodeje : (Pozor: Tlačítka, která se musí zmáčknout nemusí svítit)
Jednou stiskněte tlačítko, které se nachází na dotykovém displeji úplně vlevo dole. (Ikonka šipky Back)
Nyní jednou stiskněte tlačítko, které se nachází na dotykovém displeji úplně vlevo nakoře. (Ikonka Domečku Home)
Stiskněte tentokrát dvakrát tlačítko s ikonkou šipky BACK.
Nyní chvilku počkejte, než se objeví nápis „Support Menu“. Poté jej stiskněte.
Objeví se nápis TAL1FA1006BR nebo něco podobného. Toto potvrdíme tlačítkem OK.
Pomocí šipek vpravo nalistujeme v menu „Reset Menu“, které opět potvrdíme. A je to.
Tiskárna se sama restartuje (nebo se jen vypne). Po opětovném startu je tiskárna ve stavu, ve kterém měla být při její koupi. Tiskárna bude cca 5 min. provádět veškerá základní nastavení.
Pokud ani toto nepomůže, je zřejmě ten pravý čas na návštěvu servisu.
Zdroj: HP
Step 1:
Restart the router, printer and computer.
1. Turn off the router then printer and then computer.
2. Turn on the Router, Printer and then computer.
Now check the status. If the issue persists then continue with the next step.
Step 2:
Perform Semi-full reset on the printer which would restore the printer to factory defaults and you need to reconfigure the printer settings again.
How to perform Semi-full reset?
Note:- Performing a Reset will restore the following settings of the Printer to factory defaults you need to reconfigure the printer settings again.
* Language and country/region settings.
* Fax logs
* Fax headers
* Fax speed dial information.
* Network settings
On the front panel of the printer you have a display with 6 touch smart buttons around it. Three in the left and 3 in the right side of the screen. I wish you to press the buttons in the following fashion. For your reference I am sending the screenshot where you need to press the magic frame buttons.
(Please Note: You can still press these touch smart buttons even if it’s not lit)
1. Press the Bottom Left and the Top Left then press the Bottom Left twice.
2. Wait for a while and you will see Support Menu or Support TAL1FA1006BR Press OK.
3. Now scroll by pressing right arrow key until you see Resets Menu, now press OK
4. Look for Semi-full Reset, select it and press OK again.
5. The printer should shutdown and restart by itself.
6. If it does not then please turn on the printer by press ON/OFF button and follow the onscreen prompts.
Please perform the steps as mentioned and wait for the reset to complete.
Step 3:
Turn on the Wireless.
1. Press the Wireless icon (menu) on the printer display
2. Now select Enable Wireless option.
Step 4:
Run Wireless Network Wizard.
1. Press the Wireless icon (menu) on the printer display.
2. Under that select Wireless Setup Wizard and follow the onscreen instructions to run the Wireless Setup wizard.
Note: If your router support Push button mode then select Wireless Settings under wireless menu. Now under Wireless settings select Wi-Fi Protected Setup and Select Push Button option.
Now check the status. If the issue persists then please follow the below step to disable the UPnP service in the Embedded web server of router and check the status.
Step 5:
Disable UPnP service in the EWS of the router.
Note: The settings might vary depending upon the router.
1. Open Internet Explorer window.
2. Type „http:\\
3. When you get pop up to enter Username and password. Enter the username and password.
4. After EWS page of the router opens. Now towards the Left of the window check for Advanced Network.
5. Click on the option and uncheck the tick mark next to Enable UPnP.
Now check the status and get back to us with the results.


